Posts

DONUT Ever Stop Believing!

Image
Hello friends! Have you seen the Paperie Ink's New Release? It's packed with cuteness!!! Today, I'm sharing a cute card featuring the Donut Hog stamp set. I love how you can easily combine the images with the older stamp sets from previous releases. Now, let's get started! To start, I stamped all the images from the Donut Hog, Seasun of Fun and My Somebunny stamp sets using Memento Tuxedo Black Ink Pad. I colored them using Copic markers and cut them using the coordinating dies. (YES!! Paperie Ink now has coordinating dies for their new release stamp sets!!). Next, I took a white card stock and ran it through my die cut machine using Mama Elepahant Comic Cover Wonky Die and ink blended Distress Oxide Wilted Violet, Picked Raspberry and Squeezed Lemonade. I splattered it with silver watercolor paint from Kuretake Gansasi Tambi. For the sentiment, I die cut the word DONUT using the Heffy Doodle Stitched Alpahabetters Die. I then popped all the images and sentiment up usin...

Cute Birthday Card

Image
Hello crafty friends! It's Lidya here and I'm so happy to share a cute birthday card with you today. Now, let's get started! First, I started by stamping all the images from the Popping By, Bed Heads and Quill You Be Mine stamp sets using Memento Tuxedo Black Ink Pad. I colored them using Copic markers and cut them out using the coordinating dies.  I took a piece of Simpy Teal-icious cardstock, ran it through my die cut machine using the largest die cuts from Fancy Nancy Frames Dies and the second largest die from Imperial Stitched Rectangles Dies. Next, I took a white card stock, cut it using the Fancy Nancy Frames Dies and picked up all the heart die cuts. I then colored the heart die cuts using Copic markers, I used Y00, R02, YG11, RV10 and BV000.  I used double sided tape to adhere the front panel to a piece of pattern paper and then using the Glubert craft glue to adhere the heart die cuts. I stamped the sentiment from the Everyday Sentiment Duos stamp set on a white c...

You're Out of This World

Image
Hello friends!! I'm super thrilled to share that I've joined the Paperie Ink Design Team. I also have some exciting news for you, Paperie Ink's NEW RELEASE is coming this Saturday, make sure to check their store website . Today, I'm sharing a fun interactive card using the Monster Mash stamp set, which is part of the new release.  To start, I stamped all the images from the Monster Mash and You Are stamp sets using Memento Tuxedo Black Ink Pad. I colored them using Copic markers and cut them using the coordinating dies. Next, I took a white card stock and ran it through my die cut machine using My Favorite Things Die-namics Outside The Box Level Up. For the stitched arch panel, side panel mats and front panel I ink blended Distress Oxide Wilted Violet, Blueprint Sketch, Picked Raspberry, Salvaged Patina and Squeezed Lemonade.  For the interior shelves, I cut a white card stock using Lawn Fawn Cloud Border Die and applied Distress Oxide Victorian Velvet. Finally, I assem...

Thank You Pop-Up Box Card

Image
Hello friends! Today, I'm sharing a special thank you card that I made for my friend using the Heffy Doodle You're Weird stamp set.   To start, I stamped all the images from the You're Weird and Spaced Out  stamp sets using Memento Tuxedo Black Ink Pad. I colored them using Copic markers and fussy cut them out. I die cut two pieces of white card stock using the largest main frame die from the Big Shadow Box Die and ink blended Distress Oxide Wilted Violet, Black Soot, Blueprint Sketch, Candied Apple, Carved Pumpkin, Scattered Straw and Cracked Pistachio. To help me build the scene, I also die cut a white card stock using the inside panels die and ink blended both of the panels using the Distress Oxide. I then splattered it using the gold and silver watercolor paint from Kuratake Gansai Tambi. I took one of the panel and used the double stitched window to cut the center. For the sentiment, I took a black card stock and die cut the word THANKS using the Stitched Alphabetters...

Round Easel Card

Image
Hi everyone! Today, I'm sharing a super fun round easel card featuring these adorable seals from the Sealy Friends stamp set .  Now, let's get started! First, I started by stamping all the images from the Sealy Friends , colored them using Copic markers and fussy cut them out. Next, I took a white card stock and cut it using a circle dies. I used a sunshine stencil and applied Distress Oxide Squeezed Lemonade. I took another white card stock, cut it using the Breaking Waves Border Dies and ink blended Distress Oxide Cracked Pistachio and Evergreen Bough. I splattered it with white and black acrylic paint.   I took a white card stock, fold it in a half, cut it using a scalloped circle die with part of the circle die hanging of the fold of the card, then score one half of the card across the middle of it. Put adhesives on half of the card and adhered the front panel.  For the front panel, I cut a patterned paper using the same scalloped circle die I used above and...

Fun Interactive Magical Rain Shaker Card

Image
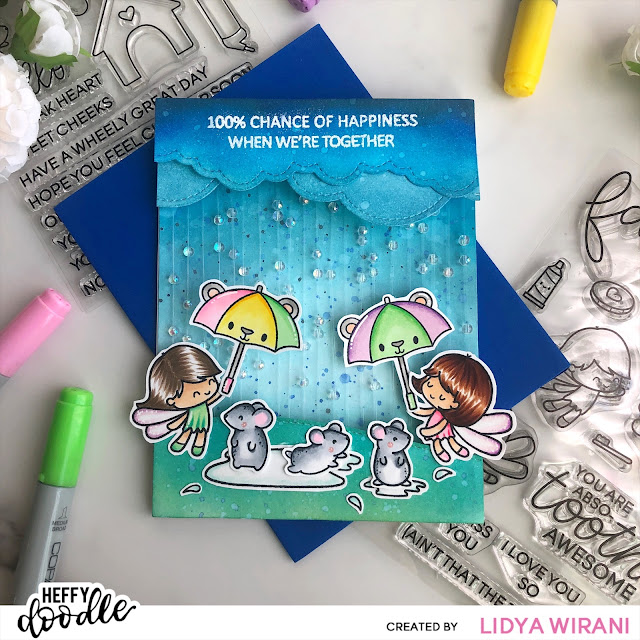
Hello crafty friends! Today I'm sharing a fun interactive magical rain shaker card featuring these cute fairies from the Absotoothly Awesome and cute mice from the Hello Squeekheart stamp set. Now, let's get started! First, I started by stamping all the images using Memento Tuxedo Black Ink Pad, colored them using Copic markers and fussy cut them out (coordinating dies available here). For the background panel, I cut an A2 size white card stock and ink blended Distress Oxide Blueprint Sketch and Salty Ocean, then splattered it with blue watercolor paint. I applied a piece of deep foam tape on the top and one on the bottom. Next, I threaded the clear beads on invisible nylon thread and then adhered it to the foam tape.  For the front panels, I took a white card stock, cut it using the cloud border dies and ink blended Distress Oxide Blueprint Sketch and Salty Ocean. I heat-embossed the sentiment using white embossing powder.  I took another white card stock, cut it using the ...

Hope You're FELINE Better Soon

Image
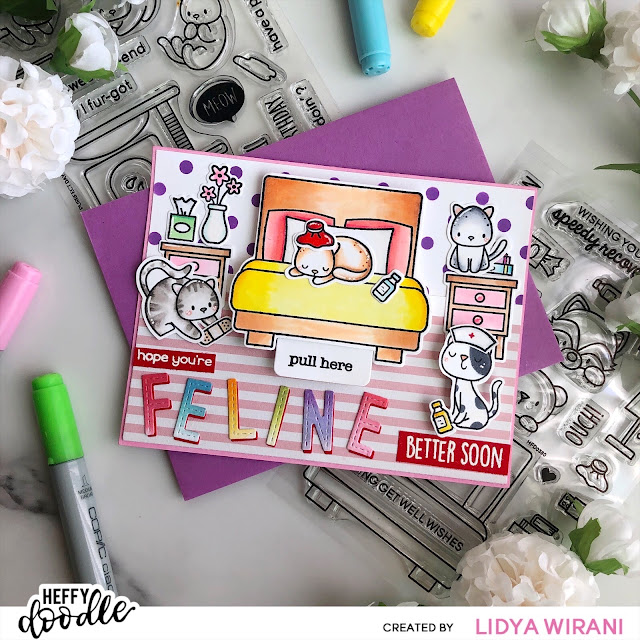
Hello friends! Today I'm sharing a cute get well soon card with a fun interactive element. Now, let's get started! First, I started by stamping the images from the  Bed Heads ,  Perfect Day  and  Mewniverse  stamp sets using Memento Tuxedo Black Ink Pad . I colored them using Copic markers and fussy cut them out (coordinating dies available  here ). Next, I took a piece of white card stock, placed  Let's Polka stencil  and applied Distress Oxide Wilted Violet. I adhered a piece of patterned paper for the floor. For the interactive element, I used  the Mini Double Slider Dies . This set of dies allow you to easily create a mechanism to create pop up images on your cards. (for the instruction on how to assemble this dies, please see the video  here ). I die-cut the word FELINE using  the Stitched Alphabetizers Dies  and applied Distress Oxide. I heat-embossed the sentiment from  the Bed Heads  on a red card stock u...