Posts

Showing posts from June, 2021

Hope Your Day is DINO-mite

Image
Hello crafty friends! It's Lidya here and I'm so happy to share another card with you in my Let's Mix It Up series . Do you love dinosaurs? I do! I find them fascinating, so today I'm sharing a cute card featuring these adorable dinos from the  Dino Time  and  Dinky Dinos  stamp sets. To start,  I cut a white card stock using  Stitched Rounded Imperial Rectangle Die s and ink blended Distress Oxide Carved Pumpkin and Dried Marigold. I splattered it with gold watercolor paint and Distress Oxide Candied Apple. Next, I cut a white card stock using a curved landscape border from  Slimline Scenery Dies  and ink blended Brushed Corduroy and Walnut Stain. I stamped all the images from  Dino Time ,  Dinky Dinos ,  Geology Rocks  and  Popping By  stamp sets. I colored them using Copic markers and cut them using  the coordinating dies . For the sentiments, I cut a white card stock using  Stitched Alphabetizers Dies  and inked them using Distress Oxide. I heat-embossed the sentime

Happy Birthday and Hugs

Image
Happy Monday everyone!! This is Lidya here today sharing two adorable cards featuring these awesome shadow word dies and also these cute critters from the To-tail-ly Awesome and Don't Worry Be Hoppy stamp sets. Now, let's get started! For the first card, I cut an A2 sized card panel, used the My Favorite Thing Rolling Clouds Stencil and inked Distress Oxide Shaded Lilac, Picked Raspberry, Dried Marigold and Squeezed Lemonade. Next, I cut a white card stock using grass border die and ink blended Distress Oxide Twisted citron and Mowed Lawn.  I stamped all the images from Galentine and  Don't Worry Be Hoppy  stamp set, colored them using Copic markers and fussy cut them out (coordinating dies available here ). For the sentiments, I die-cut a white and red card stock using Happy Birthday Shadow Word Para-dies .  I assembled the card together using glue and foam tape. To finish it off, I adhered my front panel to a pink glitter card stock and added some red droplets embell

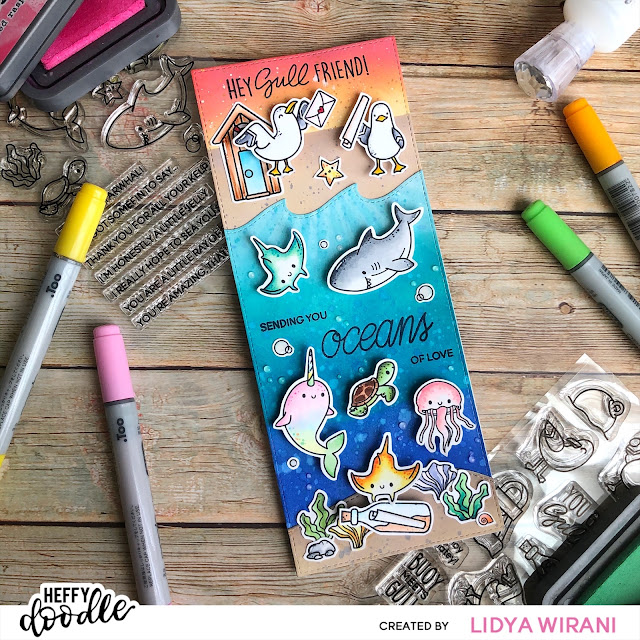
Sending You Oceans of Love

Image
Hello crafty friends! ! I'm back to share another card with you in my Let's Mix It Up series . As we are heading into summer,  I'm sharing a fun-filled summery slimline card featuring two of my favorite stamps, the  Oceans of Love  and  You Go, Gull  stamp sets. Now, let's get started! First, I cut a white card stock using the largest rectangle die from  Stitched Slimline Trio Dies  and ink blended Distress Oxide Picked Raspberry, Carved Pumpkin and Dried Marigold for the sky background. I then splattered gold shimmer paint and white acrylic paint. For the beach, I ink blended Distress Oxide Antique Linen and Brushed Corduroy. Next, I cut a white card stock using  Breaking Waves Border Dies  and ink blended Distress Oxide Tumbled Glass, Peacock Feathers, Salted Ocean and Blueprint Sketch. I then splattered it with water. To create the bottom of the ocean, I die cut a white card stock using  Breaking Waves Border Die  and ink blended Distress Oxide Antique Linen and Waln

Cute as A Button!

Image
Hello crafty friends! It's  Lidya  here today sharing a cute and fun-filled slimline shaker card featuring the new Oh Baby! stamp set from #merakiversary release.  To start, I took a white card stock, ran it through my die cut machine using the  View from My Window die  and ink blended Distress Oxide Blueprint Sketch , Shaded Lilac and Spun Sugar.  I then took another white card stock and using the same combination of Distress Oxide as I mentioned above and us it as the card base. I splattered both of the card stock using white acrylic paint. I heat-embossed the sentiment onto my front panel using red embossing powder.  I die cut a foam sheet using the  View from My Window die  and put it aside. Next, I adhered a piece of acetate sheet onto the front panel,  adhered my foam sheet onto the acetate sheet and filled it with shaker element. I then adhered it onto the card base.  To decorate the front panel, I stamped all the images from  Oh Baby! stamp set  using Memento Black Ink Pa

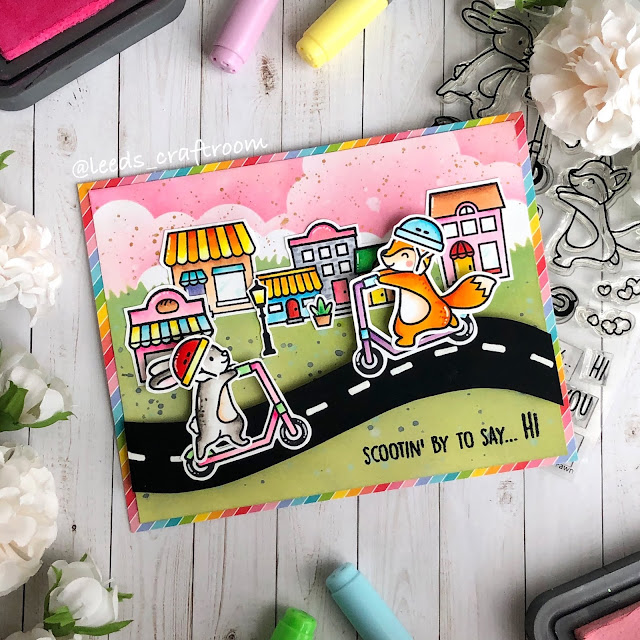
Scottin' By To Say... HI

Image
Hello friends! Today I'm sharing a cute card featuring Lawn Fawn new release, the Scootin' By stamp set. To start, I stamped all the images from Lawn Fawn Village Shops and Scootin' By stamp sets using Memento Tuxedo Black Ink Pad. I colored them using Copic markers and fussy cut them out.  Next, I took a piece of white card stock, used My Favorite Things Rolling Clouds stencil and inked Distress Oxide Picked Raspberry and Spun Sugar. I then used grass stencil and inked Distress Oxide Shabby Shutters and Mowed Lawn.  To build the scene, I created a road using a black card stock and added the road divider using white gel pen. I heat-embossed the sentiments from Scootin' By stamp set onto the card panel using clear embossing ink pad and black embossing powder.  Finally, I assembled the card together using Tombow mono liquid glue and popping the road, the bunny and the fox up using foam tape for some dimensions. Thank you so much for stopping by today! Have a wonderful wee